Introduction
Did you know that the average household wastes 10,000 gallons of water per year due to leaks alone? That’s enough to fill a swimming pool! Water is one of our planet’s most precious resources, yet we often take it for granted—especially in our homes. The good news? You don’t need fancy gadgets or pricey tools to start saving water. With a little creative thinking and some common home items, you can create your own DIY water-saving gadgets that are both effective and affordable.
In this article, we’ll explore how you can build simple, eco-friendly gadgets to reduce water wastage in your home. Whether you’re a DIY enthusiast, a parent looking for fun projects to do with your kids, or someone who wants to live more sustainably, these ideas are perfect for you. Let’s dive in and discover how small actions can make a big difference!
Why DIY Water-Saving Gadgets Matter
Before we get into the nitty-gritty of building these gadgets, let’s talk about why they matter. Water conservation isn’t just about protecting the environment—it’s also about saving money and empowering ourselves to take control of our resource usage.
Environmental Impact
Every drop of wasted water has consequences. Treating and transporting water requires energy, which contributes to greenhouse gas emissions. Additionally, excessive water usage strains local supplies, especially in areas facing droughts or water shortages. By conserving water, we can help protect ecosystems and ensure clean water remains available for future generations.
Financial Benefits
Water isn’t free, and neither is the energy used to heat it. Reducing water wastage directly impacts your utility bills. For example, fixing a single leaky faucet could save you up to $35 annually . Multiply that by multiple fixtures, and the savings become substantial. DIY gadgets are an affordable way to cut costs without compromising on effectiveness.
Empowerment Through Creativity
There’s something incredibly satisfying about creating something useful with your own hands. These DIY projects not only teach valuable skills but also inspire sustainable habits. Plus, they’re a great way to involve kids in learning about environmental responsibility. When you see the tangible results of your efforts, it motivates you to keep going.
List of DIY Water-Saving Gadgets
Now, let’s get to the fun part: making your own water-saving gadgets! Below are six creative ideas using materials you probably already have at home. Each gadget comes with step-by-step instructions, so even beginners can follow along.
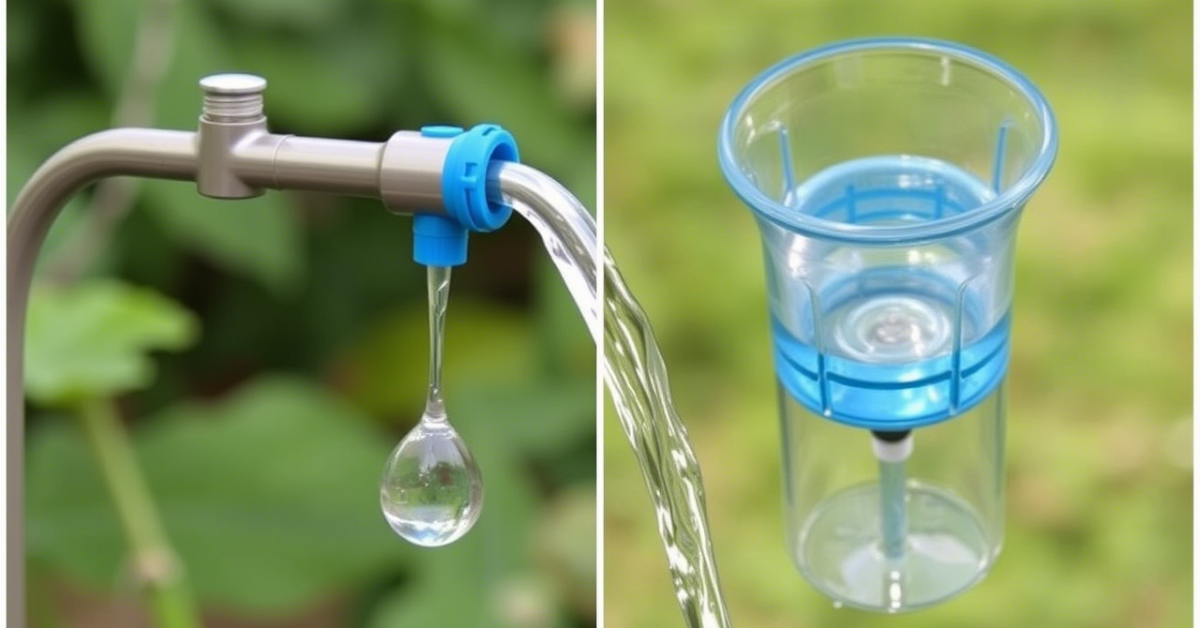
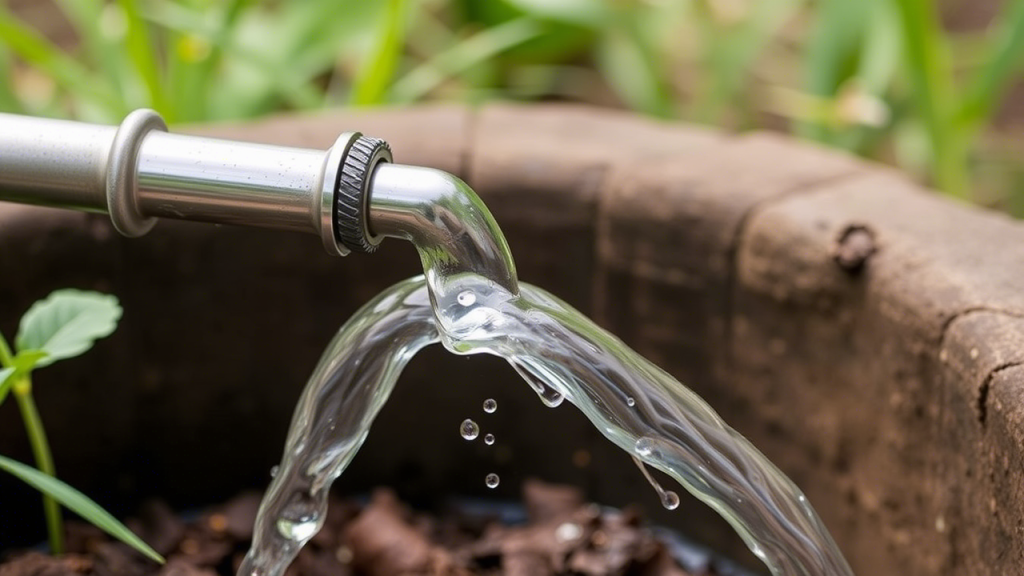
1. DIY Faucet Aerator
A faucet aerator reduces water flow without sacrificing pressure. It’s a simple device that mixes air with water, making it feel like you’re using more water than you actually are.
- Materials Needed :
- Plastic bottle cap (e.g., from a soda bottle)
- Mesh screen or fine cloth
- Glue or tape
- Step-by-Step Instructions :
- Poke small holes in the plastic bottle cap using a nail or needle.
- Cover one side of the cap with mesh or cloth to filter the water.
- Secure the mesh with glue or tape.
- Place the cap over your faucet nozzle and test the water flow.
- How It Works :
- The aerator slows down the water flow while maintaining pressure, saving up to 30% of water per minute .
- Customization Options :
- Experiment with different hole sizes to adjust the flow rate based on your needs.
2. Rainwater Collection System
Rainwater harvesting is a fantastic way to collect free water for gardening or cleaning. This DIY system uses basic materials to store rainwater efficiently.
- Materials Needed :
- Large plastic barrel or bucket
- PVC pipes or gutters
- Mesh screen (to filter debris)
- Step-by-Step Instructions :
- Place the barrel under a downspout or roof edge where rainwater flows.
- Attach PVC pipes to direct water into the barrel.
- Cover the opening with a mesh screen to keep leaves and dirt out.
- Use the collected water for watering plants or cleaning outdoor spaces.
- How It Works :
- This system captures rainwater that would otherwise go to waste, reducing reliance on municipal water for non-potable uses.
3. Greywater Diversion Device
Greywater refers to gently utilized water from sinks, showers, or washing machines. Instead of letting it go down the drain, you can redirect it to irrigate plants.
- Materials Needed :
- Bucket or container
- Tubing or hose
- Sealant
- Step-by-Step Instructions :
- Place a bucket under your sink to catch rinse water.
- Connect the tubing to the bucket and direct it toward your garden.
- Ensure That all connections are sealed to prevent leaks.
- How It Works :
- Greywater systems recycle water for irrigation, helping you conserve fresh water.
4. Toilet Tank Bank
One of the main sources of water waste in households is the toilet. A toilet tank bank displaces water in the tank, reducing the amount used per flush.
- Materials Needed :
- Plastic bottle (e.g., soda bottle)
- Pebbles or sand
- Water
- Step-by-Step Instructions :
- Fill the bottle with pebbles or sand to weigh it down.
- Add water to the bottle until it’s full.
- Place the bottle inside the toilet tank, away from moving parts.
- How It Works :
- This gadget saves up to 0.8 gallons per flush , which adds up quickly in households with frequent toilet use.
5. Leak Detector Alarm
Leaks can waste hundreds of liters of water before they’re noticed. A DIY leak detector alarm alerts you to leaks early, preventing costly damage.
- Materials Needed :
- Tin foil
- Batteries
- Wires
- Buzzer
- Step-by-Step Instructions :
- Attach wires to the battery and buzzer.
- Place tin foil under areas prone to leaks (e.g., under sinks).
- When water touches the foil, the circuit completes, triggering the buzzer.
- How It Works :
- This simple alarm detects leaks instantly, allowing you to fix them before they escalate.
6. Drip Irrigation System
Drip irrigation delivers water straight to plant roots, minimizing evaporation and runoff.
- Materials Needed :
- Old soda bottles
- Nails
- String
- Step-by-Step Instructions :
- Poke small holes in the bottom of a soda bottle using a nail.
- Bury the bottle upside-down near the base of a plant.
- Fill out the bottle with water, and it will slowly drip into the soil.
- How It Works :
- This system ensures efficient watering, especially during hot weather.
Benefits of Using DIY Water-Saving Gadgets
These gadgets aren’t just fun to make—they also offer significant benefits:
Environmental Benefits
By conserving water, you reduce the strain on local supplies and lower your carbon footprint. Every gallon saved makes a difference.
Financial Benefits
Reducing water usage lowers your utility bills. Many of these gadgets cost little to nothing to make, offering long-term savings.
Lifestyle Benefits
Living sustainably fosters mindfulness and encourages healthier habits. When you start paying attention to water usage, you naturally become more conscious of other resources too.
Challenges and Solutions
Some people hesitate to try DIY projects due to perceived challenges. Let’s address a few common concerns:
“I Don’t Have the Right Materials”
Most of these gadgets use everyday items. If you don’t have something specific, substitute it with what you do have. For example, use a jar instead of a bucket for greywater collection.
“I’m Not Handy Enough”
These projects are beginner-friendly. Start with simpler gadgets like the toilet tank bank or drip irrigation system, and work your way up as you gain confidence.
“Will These Gadgets Really Work?”
Yes! While they may not be as polished as commercial products, they’re highly effective. Remember, progress matters more than perfection.
Inspiring Stories and Case Studies
Real-life examples prove that DIY water-saving gadgets work. For instance, a family in California built a rainwater collection system using old barrels and reduced their outdoor water usage by 75% . Another homeowner installed a greywater diverter and saw her garden thrive despite cutting back on fresh water.
These stories remind us that change starts at home—and it’s possible for everyone.
Summary Table: Quick Overview of Gadgets
Here’s a quick summary of the gadgets discussed:
| Gadget | Materials Needed | Potential Savings |
|---|---|---|
| DIY Faucet Aerator | Bottle cap, mesh, glue | Up to 30% less water/minute |
| Rainwater Collection | Barrel, PVC pipes, mesh | Gallons saved daily |
| Greywater Diversion | Bucket, tubing, sealant | Recycles water for irrigation |
| Toilet Tank Bank | Bottle, pebbles, water | Saves 0.8 gallons/flush |
| Leak Detector Alarm | Tin foil, batteries, wires | Prevents costly water damage |
| Drip Irrigation System | Soda bottles, nails, string | Efficient plant watering |
This table summarizes the gadgets, materials needed to create them, and their potential savings.
Conclusion
Reducing water wastage doesn’t have to be complicated or expensive. With these DIY water-saving gadgets, you can make a meaningful impact using materials you already have at home. From creating a low-cost faucet aerator to building a rainwater harvester, each project empowers you to take control of your water usage.
So, what’s your first step? Maybe it’s setting up a rainwater collection system or trying the toilet tank bank. Whatever it is, take action today.